axxessp.r1@gmail.com
Thornton, Colorado
Bathroom Remodeling in Thornton: What to Expect From Start to Finish
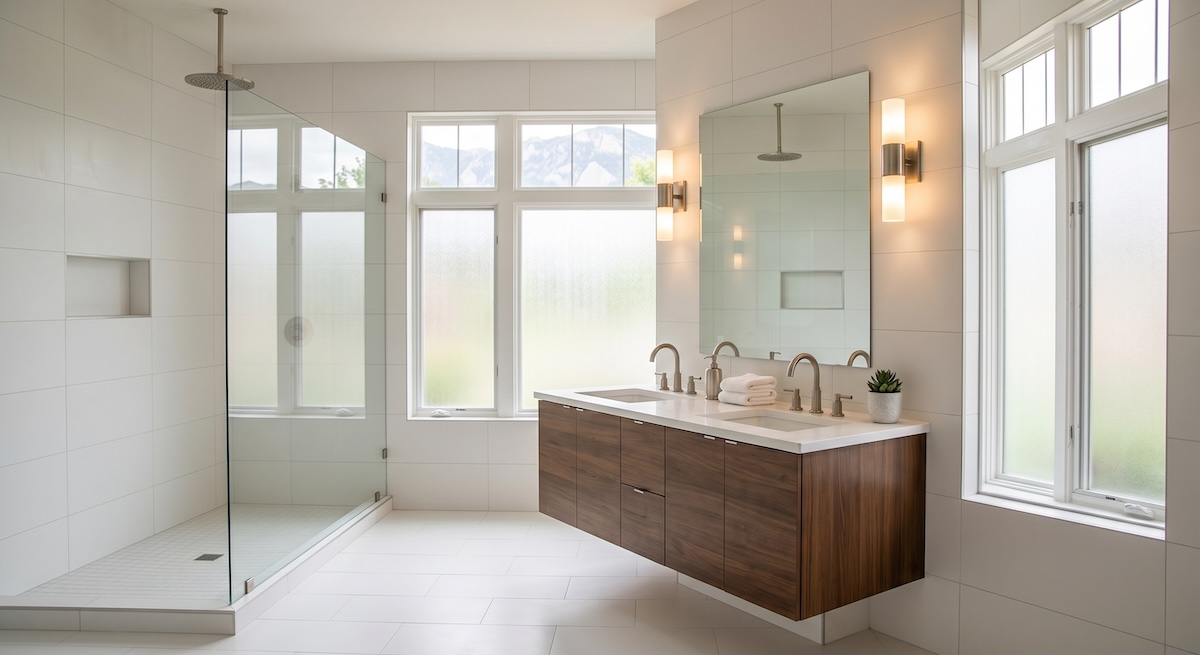
A bathroom remodel transforms one of the most-used spaces in your home. Whether you're updating an outdated guest bath or creating a spa-like master retreat, understanding the process helps you prepare for what's ahead. Bathroom renovations involve multiple trades, specific sequencing, and coordination that can feel overwhelming without proper guidance.
At AXXESS Painting & Remodeling, we've completed bathroom remodels throughout Thornton, Westminster, Denver, and the Front Range. Here's a comprehensive guide to what you can expect from the first consultation through the final walkthrough.
Why Bathroom Remodeling Is Worth the Investment
Bathrooms rank among the most valuable home improvements you can make. A well-executed bathroom remodel typically recoups 70-75% of its cost at resale, and in some markets returns even more. Beyond financial returns, an updated bathroom improves daily comfort, addresses functional problems, and can accommodate changing family needs.
The median age of American homes now exceeds 40 years, meaning many bathrooms require functional updates. Remote work trends have elevated the importance of well-designed home spaces, and outdated layouts simply don't accommodate modern lifestyles.
For Thornton homeowners, bathroom remodeling addresses common issues in our housing stock: builder-grade finishes that have worn out, inefficient layouts, outdated fixtures, and bathrooms that no longer meet family needs.
Phase 1: Initial Consultation and Design Planning
The First Meeting
Every bathroom remodel begins with a conversation. During the initial consultation, typically lasting 45-60 minutes at your home, you'll discuss:
Your goals and vision. What frustrates you about your current bathroom? What would make your daily routine easier? Are you planning to age in place and need accessibility features? Do you want a luxurious retreat or a practical family bathroom?
Budget expectations. Honest discussion about budget helps your contractor recommend appropriate options. Bathroom remodels range widely, from $8,000 for basic updates to $50,000 or more for luxury master bathrooms. Understanding your investment level guides all subsequent decisions.
Scope of work. Will you keep the existing layout or reconfigure the space? Are you doing a surface refresh or a complete gut renovation? Does the project include only the bathroom or adjacent spaces like closets?
Timeline considerations. When do you need the project completed? Are there family events, holidays, or other deadlines to work around? If this is your only bathroom, how will you manage during construction?
Design Development
After the initial consultation, the design phase begins. This critical step takes 2-6 weeks depending on project complexity and shouldn't be rushed. During design development:
Measurements and documentation. Your contractor takes detailed measurements of the existing space, photographs current conditions, and notes locations of plumbing, electrical, and structural elements.
Layout options. If you're changing the floor plan, your designer presents layout alternatives. Moving plumbing adds significant cost, so understanding these tradeoffs helps you make informed decisions.
Material selections. You'll choose tile, flooring, fixtures, vanities, countertops, lighting, and hardware. This process takes time because decisions interact with each other. Your tile choice affects grout color, which affects overall appearance. Your vanity style influences lighting placement. Working through these selections systematically prevents costly changes later.
Fixture specifications. Toilets, faucets, showerheads, and other fixtures come in countless options at various price points. Your contractor can recommend products that balance quality, aesthetics, and budget.
Getting Your Estimate
A detailed estimate should include:
Complete scope of work broken down by category Material costs with specific products identified Labor costs for each trade Permit fees and inspection requirements Contingency allowance for unexpected discoveries Payment schedule with amounts and timing Project timeline with start and completion dates Warranty information
Review the estimate carefully and ask questions about anything unclear. This document becomes the foundation of your contract.
Phase 2: Permits and Pre-Construction Planning
Understanding Permit Requirements in Thornton
Bathroom remodels involving plumbing modifications, electrical work, or structural changes require permits under Colorado building codes. Thornton, Westminster, Denver, and other Front Range communities each maintain separate permit systems.
Projects that typically require permits:
Moving or adding plumbing fixtures such as toilets, showers, tubs, or sinks Replacing or rerouting drain lines, water lines, or vents Adding new electrical circuits, outlets, lighting, or heated floors Removing or modifying walls Converting a tub to a walk-in shower when plumbing locations change Installing new ventilation fans
Projects that typically don't require permits:
Painting and cosmetic updates Replacing fixtures in the same location without modifying plumbing Swapping vanities without plumbing changes Installing new mirrors, towel bars, and accessories Replacing flooring without structural changes
Your contractor handles permit applications, but you should understand what's required. Permits protect you from unsafe work, failed inspections, and problems when you eventually sell your home. Unpermitted work can create serious complications during real estate transactions.
Ordering Materials
Lead times for bathroom materials vary significantly. Standard fixtures may ship within days, while custom vanities, specialty tile, or specific fixtures can take 4-12 weeks. Your contractor orders materials early in the process to prevent construction delays.
During this phase, confirm all selections are finalized. Changes after materials are ordered can delay your project and incur additional costs.
Preparing Your Home
Before construction begins:
Clear the bathroom completely. Remove all personal items, toiletries, towels, and anything stored in cabinets or closets.
Protect adjacent spaces. Construction dust travels throughout homes. Your contractor will set up dust barriers, but removing or covering items in nearby rooms helps.
Plan for bathroom access. If you're remodeling your only bathroom, discuss arrangements with your contractor. Some phases allow limited access; others require alternative facilities. Many homeowners stay with family, use a nearby gym, or rent portable facilities for a few days.
Arrange pet and child care. Construction zones aren't safe for curious kids or pets. Plan to keep them away from work areas.
Discuss parking and access. Workers need parking space and clear paths to carry materials in and debris out.
Phase 3: Demolition
Demolition is the dramatic start to visible construction. This phase typically takes 1-3 days depending on bathroom size and scope.
What Happens During Demo
Fixture removal. The toilet, vanity, tub or shower, and other fixtures come out first. Items in good condition may be salvaged for donation; damaged items go to disposal.
Surface removal. Existing tile, flooring, drywall, and other surfaces are removed. This is the messiest, loudest part of the project. Your contractor contains dust and debris, but expect some disruption.
Inspection of underlying conditions. Once surfaces are removed, the true condition of your bathroom becomes visible. This is when hidden problems emerge: water damage, mold, rotted framing, outdated plumbing, or electrical issues.
Dealing with Unexpected Discoveries
Nearly every bathroom remodel uncovers some surprises. Common discoveries include:
Water damage. Previous leaks often cause damage invisible until demolition. Rotted subfloor, damaged framing, or mold behind walls require remediation before construction continues.
Outdated plumbing. Older homes may have galvanized pipes that need replacement, improperly vented drains, or other issues that don't meet current codes.
Electrical problems. Older wiring may not support modern loads or meet current safety codes. Ground-fault circuit interrupter (GFCI) protection is now required in bathrooms and may need to be added.
Structural issues. Load-bearing walls, inadequate framing, or previous improper modifications may require correction.
A reputable contractor communicates discoveries promptly and provides options for addressing them. This is why contingency allowances in budgets are important. Expect 10-15% of your budget for unexpected issues, especially in older homes.
Phase 4: Rough-In Work
The rough-in phase establishes the infrastructure your finished bathroom needs. This work happens behind walls and under floors, invisible once the bathroom is complete but critical to long-term function.
Plumbing Rough-In
Licensed plumbers install or modify:
Supply lines. Hot and cold water pipes route to sink, shower, and tub locations. If you're adding features like a body spray shower or second sink, additional supply lines are installed.
Drain lines. Proper drainage requires correct pipe sizing and slope. Moving a toilet or shower means relocating drain lines, which is why layout changes add cost.
Vent lines. Plumbing vents allow drains to flow properly and prevent sewer gases from entering your home. Proper venting is code-required and essential for function.
Electrical Rough-In
Licensed electricians install:
Circuits. Bathrooms require dedicated circuits for safety. GFCI protection is mandatory for all bathroom outlets.
Outlet locations. Code requirements and your design determine where outlets are placed. Modern bathrooms often need more outlets than older designs provided.
Lighting circuits. Vanity lights, overhead lights, shower lights, and any specialty lighting like heated mirrors need proper wiring.
Exhaust fan wiring. Bathroom ventilation is essential in Colorado's dry climate and code-required in most situations.
Heated floor wiring. If you're installing radiant floor heating, the electrical rough-in happens now.
Framing and Structural Work
If your project involves layout changes:
Wall modifications. Non-load-bearing walls can be removed or added relatively easily. Load-bearing walls require proper headers and support.
Blocking installation. Grab bars, heavy mirrors, and wall-mounted fixtures need solid backing behind the drywall. Blocking installed during framing ensures secure mounting later.
Niche framing. Shower niches for shampoo storage are framed during this phase.
Rough-In Inspection
Before walls are closed, inspectors verify that plumbing, electrical, and any structural work meets code. Your contractor schedules this inspection and addresses any required corrections. Work cannot proceed until inspection passes.
This phase typically takes 1-2 weeks, including inspection scheduling.
Phase 5: Closing Walls and Waterproofing
Installing Cement Board and Drywall
With rough-in complete and inspected:
Cement board installation. Wet areas (shower walls, tub surrounds) receive cement board rather than standard drywall. This moisture-resistant substrate provides a stable base for tile.
Drywall installation. Remaining walls and ceilings receive moisture-resistant drywall appropriate for bathroom use.
Taping and finishing. Drywall seams are taped, mudded, and sanded smooth. This process requires multiple coats with drying time between, taking 3-5 days.
Waterproofing
Proper waterproofing prevents the most common bathroom problems: water damage, mold, and structural deterioration.
Shower pan waterproofing. Whether you're using a prefabricated shower base or building a custom tile shower, the floor must be completely waterproof. This critical step prevents water from reaching the subfloor and framing.
Wall waterproofing. Shower walls receive waterproof membrane over cement board. This continuous barrier prevents moisture migration into wall cavities.
Curb and corner details. Transitions where the shower floor meets walls and where walls meet each other require careful attention. These areas are most prone to leaks if improperly executed.
Waterproofing is not visible in the finished bathroom but is arguably the most important work performed. Poor waterproofing leads to expensive repairs, mold problems, and structural damage. This is why hiring experienced professionals matters.
Phase 6: Tile and Flooring Installation
Tile installation is one of the most visible and time-consuming phases. Quality tile work requires precision and patience.
Shower and Tub Tile
Layout planning. Before setting any tile, installers plan the layout to minimize cuts and ensure symmetrical patterns. This planning prevents awkward partial tiles in visible locations.
Tile setting. Working from the bottom up, installers set tile with thin-set mortar, using spacers to ensure consistent grout joints. Each row must be level and aligned.
Drying time. Tile adhesive needs time to cure before grouting. Rushing this step compromises the installation.
Grouting. Grout fills joints between tiles. Color selection affects the overall appearance significantly. After application, grout needs curing time before getting wet.
Sealing. Depending on tile and grout types, sealing may be required to prevent staining and moisture penetration.
Shower and wall tile installation typically takes 5-7 days for an average bathroom, longer for complex patterns or large spaces.
Floor Tile Installation
Subfloor preparation. The floor must be flat and stable before tile installation. Leveling compound corrects minor irregularities.
Tile installation. Floor tile follows similar processes to wall tile, with careful attention to layout and alignment.
Transition details. Where tile meets other flooring or thresholds, transitions must be handled properly for appearance and function.
Floor tile installation adds 2-3 days to the project timeline.
Alternative Flooring Options
Not all bathroom floors are tile. Other options include:
Luxury vinyl plank (LVP). Waterproof, comfortable underfoot, and available in many styles. Installation is typically faster than tile.
Sheet vinyl. Budget-friendly and waterproof with fewer seams than tile or plank.
Natural stone. Marble, travertine, or slate provide luxury aesthetics but require sealing and more maintenance.
Your contractor can discuss the pros and cons of each option for your specific situation.
Phase 7: Fixture Installation
With surfaces complete, the bathroom starts looking like a bathroom again.
Vanity and Countertop
Vanity installation. The vanity cabinet is positioned, leveled, and secured. Proper installation ensures doors and drawers operate correctly.
Countertop installation. Whether prefabricated or custom, the countertop is set and secured. Sink cutouts are made precisely for undermount or drop-in sinks.
Sink and faucet. The sink is mounted and the faucet installed and connected. Plumbers return to make final connections.
Toilet Installation
Flange preparation. The toilet flange, which connects the toilet to the drain, must be at the correct height relative to the finished floor.
Toilet setting. The toilet is positioned over the flange with a wax seal, secured, and connected to the water supply.
Testing. The toilet is tested for proper flush, refill, and leak-free operation.
Shower and Tub Fixtures
Shower valve trim. The handle and escutcheon plates that control water temperature and flow are installed.
Showerhead installation. Fixed heads, handheld sprayers, rain heads, or combination units are installed and tested.
Tub fixtures. If your project includes a tub, the spout, drain, and overflow are installed and tested.
Glass enclosure. If you're installing a frameless glass shower enclosure, this happens after tile and fixtures are complete. Glass installation requires precise measurements and typically takes 1-2 days.
Other Fixtures
Lighting. Vanity lights, overhead fixtures, and any specialty lighting are installed and connected.
Exhaust fan. The ventilation fan is installed and connected to ductwork.
Accessories. Towel bars, toilet paper holders, robe hooks, and other accessories are mounted.
Mirror. Whether a simple mirror or a medicine cabinet, this finishing touch completes the vanity area.
Fixture installation typically takes 2-4 days depending on complexity.
Phase 8: Final Details and Completion
Painting and Touch-Ups
Wall painting. Walls receive their final paint color. Bathroom paint should be moisture-resistant and mildew-resistant, typically in eggshell or satin finish.
Touch-up work. Any scuffs, marks, or imperfections from construction are addressed.
Caulking. Silicone caulk seals transitions between surfaces: where tile meets tub, where countertop meets wall, around fixtures. Proper caulking prevents water infiltration and completes the finished appearance.
Final Inspection
If permits were required, a final inspection verifies that all work meets code. The inspector checks:
Electrical connections and GFCI protection Plumbing connections and leak-free operation Ventilation function Overall compliance with approved plans
Your contractor schedules this inspection and addresses any required corrections.
Cleanup
Professional contractors leave your bathroom clean and ready to use:
Construction debris removal. All demolition materials, packaging, and waste are removed.
Thorough cleaning. Surfaces are cleaned of construction dust, grout haze, and any marks from the work.
Protection removal. Dust barriers and floor protection throughout your home are removed.
Final Walkthrough
Before your contractor considers the project complete, walk through the bathroom together:
Test everything. Run the shower, flush the toilet, operate all faucets, turn lights on and off, check that drawers and doors work properly.
Inspect details. Look at grout lines, caulking, paint edges, and tile alignment. Check that fixtures are secure and properly aligned.
Note any concerns. Point out anything that doesn't look right or function correctly. A reputable contractor wants to address issues before leaving.
Review care instructions. Your contractor should explain any maintenance requirements: sealing schedules for natural stone, caulk maintenance, fixture care, and other ongoing needs.
Collect documentation. Keep warranties, product information, and any leftover materials (grout, caulk, paint) for future repairs.
How Long Does a Bathroom Remodel Take?
Timelines vary based on scope, but here are general expectations:
Cosmetic refresh (new fixtures, paint, accessories without moving plumbing): 1-2 weeks
Standard full remodel (new tile, fixtures, vanity keeping same layout): 3-5 weeks
Complete renovation (layout changes, moving plumbing, custom features): 6-10 weeks
Master bathroom with luxury features (custom tile, soaking tub, large shower, custom cabinetry): 8-12 weeks
These timelines represent active construction. Add 4-8 weeks before construction for design, material selection, ordering, and permit approval. Material lead times can extend this further for custom or specialty items.
Living Through a Bathroom Remodel
If It's Your Only Bathroom
Many Thornton homes have just one full bathroom, making renovation logistics challenging. Options include:
Portable facilities. Rental units provide basic facilities during the days when your bathroom is completely unavailable.
Gym or recreation center membership. Temporary membership provides shower access during construction.
Staying with family or friends. For short periods of complete unavailability, staying elsewhere may be easiest.
Phased construction. Your contractor may be able to schedule work so the toilet remains usable during most of the project, with only a few days of complete unavailability.
Discuss this candidly with your contractor during planning. They can often schedule work to minimize inconvenience.
Managing Dust and Disruption
Dust barriers. Your contractor should set up plastic barriers to contain dust in the work area.
Daily cleanup. Professional crews clean up daily, though some dust migration is inevitable.
Adjust expectations. Your home won't feel completely normal during construction. Accepting this reduces stress.
Communicate concerns. If something isn't working, tell your contractor promptly rather than letting frustration build.
Choosing the Right Thornton Bathroom Remodeler
Not all contractors deliver the same results. When evaluating bathroom remodelers:
Verify licensing and insurance. Colorado requires contractor registration. Confirm current liability insurance and workers' compensation coverage.
Check references. Call previous customers and ask detailed questions about their experience, communication, quality, and how problems were handled.
Review portfolios. Look at completed projects similar to yours. Quality of tile work, attention to detail, and overall aesthetics should match your expectations.
Evaluate communication. How responsive are they during the estimate process? Do they explain things clearly? Good communication during sales usually predicts good communication during construction.
Understand their process. Professional contractors have systematic approaches to design, material selection, construction sequencing, and quality control.
Get detailed estimates. Vague proposals lead to misunderstandings. Detailed line-item estimates prevent surprises.
Ready to Transform Your Thornton Bathroom?
A bathroom remodel is a significant investment in your home's comfort, function, and value. Understanding the process from start to finish helps you prepare for what's ahead and make informed decisions along the way.
At AXXESS Painting & Remodeling, we guide Thornton homeowners through every phase of bathroom renovation. From initial design concepts through final walkthrough, our experienced team delivers quality craftsmanship and clear communication.
Whether you're refreshing a tired guest bath, creating a spa-like master retreat, or updating for accessibility, we're here to help make your bathroom vision a reality.
Schedule your free consultation today by calling 720-226-5092 or contacting us online. We proudly serve Thornton, Westminster, Denver, Boulder, Aurora, Arvada, Brighton, Erie, Broomfield, and communities throughout the Front Range.